by Dean Solberg co-founder and president of Exact Metrology

This technology can inspect the interior structure of injection molded, cast, forged or fabricated parts made from metal, plastic, polymers, composites and 3D printed products, without causing any harm or destruction to the objects themselves. And that’s only the beginning.
The ability to “see through” a solid object was once thought to be a tool of the future, or a power belonging to Superman – but the technology is here today, and more widespread and accessible than you may have thought. Until recently, the technology of computed tomography (CT) imaging was only available for use in medical settings. But over the last several years, it has found a new home in the world of manufacturing, and it is opening up myriad opportunities that were never available before. CT is now commonly used in various industrial metrology settings, both in the lab and online or inline for product evaluation and packaging integrity assessment. The main advantage is that it allows the inspection of a part’s interior structure or a package’s closure functionality without causing any harm or destruction to the objects themselves.
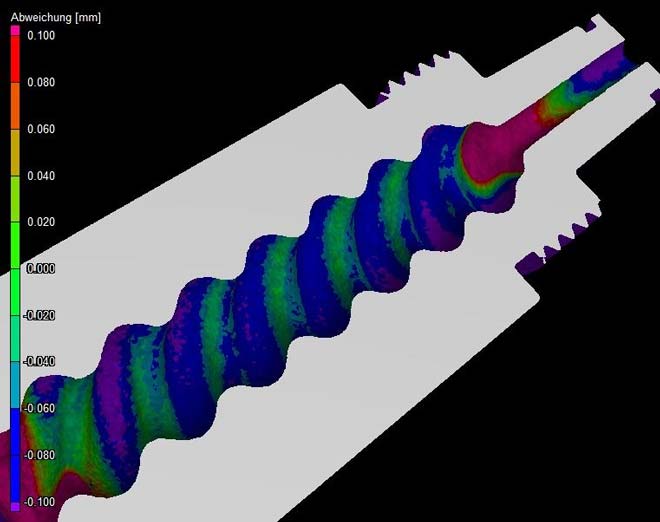
Industrial CT scanners utilize the same type of technology as CT scanners in hospitals and doctors’ offices: they take multiple readings from various angles and convert the CT grey scale images into voxel-based 3-dimensional point clouds. Once the CT scanner generates the point cloud, a specialist can generate a CAD-to-part comparison map, construct a 3D model of the part, or reverse engineer the part to suit their needs. Industrial scanners can obtain the internal structure of an object nondestructively, validating extremely accurate internal dimensions, allowing comparison to reference models, no shaded zones, compatibility with all shapes and sizes, no post-processing work and extremely high-resolution imaging.
Some of the most common uses of 3D and now CT scanning in industrial metrology applications include:
- Reverse engineering – the process of taking measurements of an existing part or object, then creating an exact CAD replica. This technology is extremely useful when you have a manufactured part or object, but not the original prints or design data.
- Non-contact measurement – the process of capturing the geometry of existing objects through the use of laser emitting, camera-like 3D scanners.
- Contact measurement – a method of collecting single points relative to each other. There is a wide range of solutions for contact measurement and generally two types of systems solutions are used with portable CMMs: (1) for capturing localized or small volume information, digitizing or articulating arms are used, and (2) for larger volumetric projects, optical solutions including laser trackers and photogrammetry units.
- Long range scanning – for a detailed 360 deg 3D snapshot of a structure, bridge, plot of land, plant or process operation with millimeter accuracy.
- Model to manufacture processing – here again, artists will often have their models, whether fashioned or human, scanned for dimension prior to casting a statue in bronze or producing a high-fashion line of clothing.
These 3D imaging devices and long-range scanners serve a wide range of industries and help assure that they are performing the highest level of testing and accuracy possible.
A few of the diverse industries currently using this technology and the goals sought are:
- Manufacturing – for internal inspection of components and to ensure that a part meets specifications; this includes injection molded, cast, forged or fabricated parts made from metal, plastic, polymers, composites and even 3D printed products.
- Power generation/nuclear – can scan the complex, hard to reach and hazardous areas of a nuclear power plant or conventional power generation facility for pipe alignment, boiler integrity, containment building stability and more.
- Medical – devices and equipment, implants, orthotics and prosthetics; a one-off knee joint, for example, can be accurately compared to the original CAD program as well as the doctor’s MRI for accuracy.
- Automotive and aerospace – allows engineers to do virtual testing of machinery, helps understand failures, works as a research and development tool to analyze structure, simulate reactions.
- Metal castings – to check for air bubbles and overall porosity.
- Moldmaking – provides a powerful inspection and measurement tool to validate precise injection molds and check structural integrity of a part.
There is a wide range of industrial scanning equipment styles and sizes available to suit different types of applications. Micro units in tabletop styles for lab use, up to full industrial grade floor models for in-plant or in-process use, to portable measuring arms that can be used on the shop floor or out in the field are all available today, usually from a manufacturer or a service organization, for one-time contract use, with rent or lease-to-buy arrangements optional. Many of our customers, having used our services, subsequently purchase the equipment and training to add this high-end metrology to augment their inside CMM or test lab, for example. In the case of larger production facilities, we often see metrology today being integrated into the line for instant analysis of parts, whether molded, stamped, welded or otherwise fabricated.
Typical CT scanners offer a wide range of measurement capabilities and features. Sizes start with small desktop models which meet the most stringent demands and measure the smallest 3D detail from 0.25 µm. They can be equipped with different X-ray powers, from 160 kV for nanometer resolution through 225 kV, 320 watts to the highest power of 300 kV, 320 watts. Larger scanners are available for extremely fast CT data acquisition on workpieces up to 500 mm diameter and 600 mm in height, weighing up to 50 kg (110 lb). Typical functions performed on this type of system might include 3D analysis of a scanned turbine blade, automatic pour porosity volume analysis on an aluminum casting and 3D measurements with nominal-actual CAD comparisons on a machined aluminum cylinder head.


